Integrate Email Verification with ConvertKit Using Zapier
Automate email verification in ConvertKit using Zapier. Clean your list, reduce bounces, and boost deliverability—no coding required.
Why Verify Emails in ConvertKit Before Every Send
You’ve built a great list. The open rates are solid. Then one campaign hits, and suddenly 12% of your emails bounce. Not just a few — enough to pull your sender reputation down. It’s not the content. It’s not the timing. It’s the list.
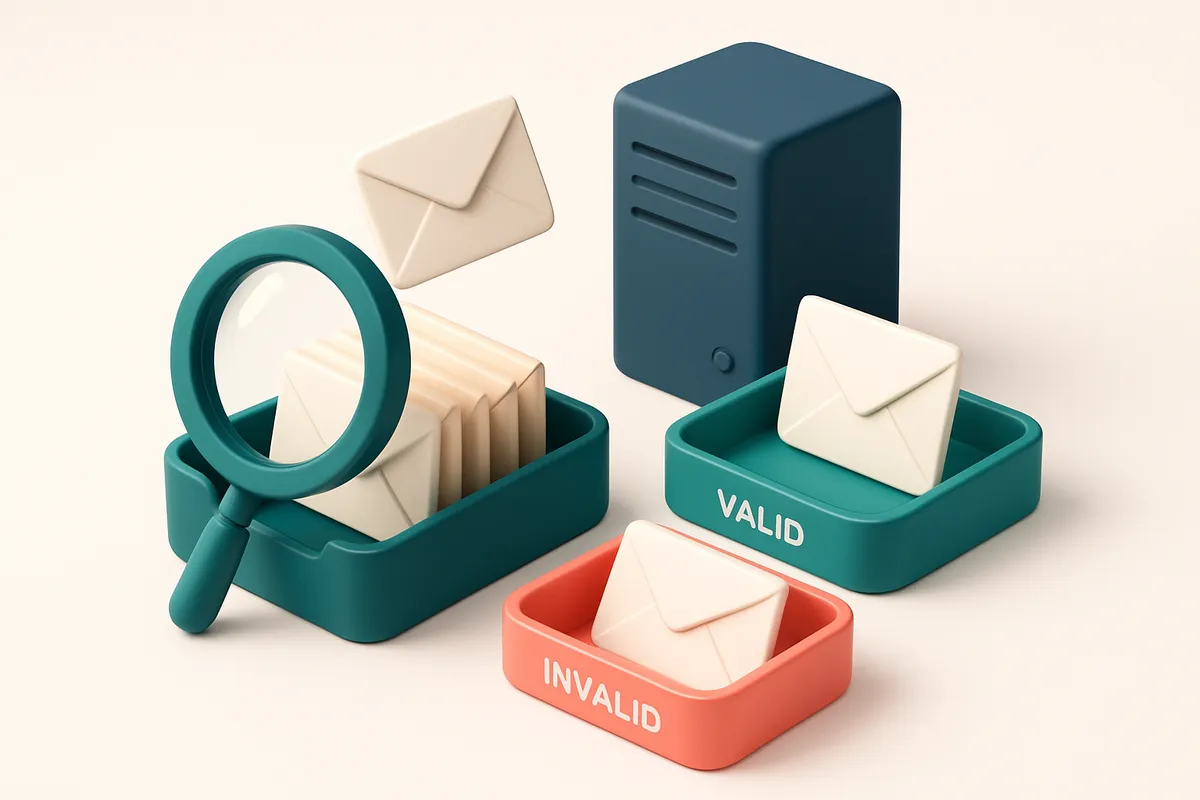
ConvertKit trusts you to manage your audience. But it doesn’t scrub for invalid, disposable, or role-based addresses before sending. That gap leaves your deliverability at risk. The fix isn’t a magic switch — it’s a pre-send verification step, and integrating email verification with ConvertKit using Zapier makes it automatic.
Each bad email you send increases your bounce rate, hurts your sender reputation, and can nudge your messages into spam filters. The best defense is cleaning your list before every send — not after.
Key takeaways
- Invalid emails hurt sender reputation and increase bounce rates, risking inbox placement.
- ConvertKit doesn’t automatically detect disposable or catch-all email addresses.
- Integrating email verification with ConvertKit using Zapier ensures only valid addresses are sent to.
How Zapier Bridges Email Verification and ConvertKit
You add a new subscriber in ConvertKit. That’s the trigger. Zapier catches it immediately, without you lifting a finger.
From there, it’s a clean handoff. Zapier runs a real-time validation check using Emaillistchecker.io’s API, probing the email’s domain, syntax, and deliverability signals—no guesswork. It’s not just about checking for typos; it’s about confirming the inbox actually exists.
Real-Time Checks, Zero Setup
Every email is tested in under a second. You’re not waiting for a batch process. The API checks for common issues like disposable domains, catch-all addresses, and invalid syntax. If it’s a role account (like admin@ or support@), it flags it as risky—because those often don’t get replies, even if they're technically valid.
What makes this work is that Zapier doesn’t require code, server infrastructure, or deep tech knowledge. You set up a simple workflow: “When a new subscriber is added in ConvertKit, check the email with Emaillistchecker.io, then update the list accordingly.” Done.
And yes—even if you’re not a developer, you can do this. Zapier’s interface is built for people who want results, not syntax.
Getting Results Back to ConvertKit
Once the check finishes, Zapier sends the result back to ConvertKit. Valid emails go straight into your active list. Invalid, risky, or disposable ones? You can tag them, set them to “unsubscribed,” or even block them from joining entirely.
This isn’t a one-off scan. It’s automated, persistent, and consistent. Every new sign-up—whether it’s through a landing page, form, or pop-up—is verified at the point of entry. That prevents low-value emails from clogging your list from day one.
It’s like installing a filter in your email funnel. The only difference? It works without a single line of code, and it’s reliable enough for any list size.
For real-time, scalable verification, the Emaillistchecker.io API handles the heavy lifting. It’s built on industry-standard checks—DNS lookups, SMTP probing, and domain reputation analysis—much like the practices used by major email providers.
Want to test how your emails perform in real inboxes? Check your deliverability with our inbox placement testing. Or if you need to find missing emails, try the email finder to expand your reach legally and efficiently.
When you integrate with ConvertKit via Zapier, you’re not just cleaning your list. You’re protecting your sender reputation—something that matters long after the first campaign ends.
Set Up the Zap: Connect ConvertKit to Zapier
Let’s get your ConvertKit audience verified in real time. The setup is straightforward, and once done, every new subscriber gets screened before they enter your email list.
Authenticate Your ConvertKit Account
You’ll need your ConvertKit API key to connect your account. This is the secure bridge between Zapier and your email platform.
- Log in to Zapier and click Create a Zap. This starts your automation workflow.
- Select ConvertKit as the trigger app. Choose New Subscriber as the event. This means Zapier will watch for new signups on your ConvertKit list.
- Connect your ConvertKit account by entering your API key. You can find this in your ConvertKit dashboard under Settings > Integrations > API. You’ll need to copy it from there.
- Test the connection. Zapier will validate your API key in real time. A successful test confirms your account is wired up and ready to send data.
- Choose your subscriber list. From the dropdown, select the specific ConvertKit list you want to verify. This ensures only emails from that list are processed.
Once this trigger is live, every new signup fires a webhook to Zapier. That’s when verification kicks in.
Use the Verification Step
Now that your list is connected, you’ll add a verification step to filter out invalid, disposable, or risky addresses before they reach ConvertKit.
- Add a step after the trigger. Search for Email Verification in the app directory.
- Choose any reliable verification service. For example, you can integrate Emaillistchecker.io’s real-time API to validate the email instantly. Our API handles syntax checks, MX lookups, and role account detection in under 200ms.
- Configure the action. Enter the email field from the trigger (usually named email or subscriber email).
- Set up filters. Use Zapier’s filter feature to only proceed with valid or “risky” emails. You can route invalid ones to a “failed verification” list or log them without adding them to ConvertKit.
- Test and turn on the Zap. Run a test by adding a known invalid email to your ConvertKit list. The Zap should catch it and skip the sync.
According to an industry report by Return Path, lists with high invalid rates often see deliverability drop by 30% or more. Automating verification cuts that risk.
Once live, the Zap will process every new sign-up instantly. This reduces bounces, helps maintain sender reputation, and keeps your subscriber list healthy.
Every verified email is a cleaner list, a stronger deliverability score, and one fewer wasted send.
You can also use bulk verification to clean existing lists—just import and check your whole database in one go.
Add Emaillistchecker.io as the Action Step
Now that you’ve selected ConvertKit as your trigger, it’s time to plug in the real verification tool: Emaillistchecker.io. This is where your list starts getting cleaned, not just scanned.
Select the Action App
- Click "Add a step" in Zapier, then search for "Emaillistchecker.io" in the app directory. Select it.
- The app appears as your action. Choose "Verify Email" from the list of available actions. This function checks each email address for syntax, domain validity, MX records, and whether it’s a known disposable or role-based account.
Connect Your API Key and Map the Field
- Click "Authenticate" and paste your Emaillistchecker.io API key. You can find this in your account settings on the platform.
- Once authenticated, you’ll see a list of inputs. Map the email field from ConvertKit (e.g., "email" or "subscriber_email") to the input field in Emaillistchecker.io. This ensures the system knows which data to process.
- Review the output: you’ll receive a structured response — valid, invalid, catch-all, or risky — for each email. These are the same signals used by major email providers to assess sender reputation.
- Let’s be clear: this isn’t just about catching typos. It’s about preventing bounces, protecting your sender reputation, and improving inbox placement. According to RFC 5321, SMTP delivery fails fundamentally if the recipient domain doesn’t respond correctly — and that includes invalid or non-existent mailboxes.
When it runs, Zapier will process every new ConvertKit subscriber. No more manual checks. No more wasted sends on dead addresses.
The result? A cleaner list, fewer bounces, and a higher chance your message lands in the inbox — not the spam folder. It’s a small step in your workflow, but it makes a measurable difference over time.
For more context on how real-time verification impacts deliverability, explore the inbox placement testing feature or dive into the API documentation if you’re building custom flows.
Map the Verification Result Back to ConvertKit
Use Zapier’s Filter Step to Control What Gets Through
Let’s make sure only valid emails reach your ConvertKit audience. After Emaillistchecker.io checks each address, use Zapier’s built-in “Filter” step to examine the result. This step lets you decide what happens next based on the status returned — valid, invalid, catch-all, or risky. The key is to filter out anything that isn’t a real, deliverable address. Sending to invalid or risky emails hurts your sender reputation. According to industry data from Return Path, even a small spike in invalid sends can negatively impact inbox placement over time.
Update ConvertKit with Verification Status
Now that you’re only passing clean data forward, update the subscriber record with a clear signal of their status. Use ConvertKit’s “Update Contact” action and add a custom field like `Verification Status`. This field can be set to “Valid”, “Invalid”, or “Risky”, depending on the result from Emaillistchecker.io. This simple step gives you total visibility. You can track how many of your leads are verified and spot trends — like a spike in risky emails that may signal a flawed list source. Now, follow the exact steps:
- Insert a ‘Filter’ step after Emaillistchecker.io in your Zap. Choose “Filter by Condition” and set it to check the field “Verification Result”.
- Set the filter to pass only valid emails. In the condition, select “is equal to” and enter “valid” (case-sensitive). This ensures invalid, catch-all, and risky addresses don’t move forward.
- Use an “Update Contact” action in ConvertKit. Select your list and map the email field. Then, add a custom field: name it “Verification Status”, and set its value to “Valid”.
- Use a “Create Contact” action for any addresses you want to retain. Even if they’re risky, you might still want to track them. Just make sure to set the status accordingly, or use a different list.
- Test the flow with real data. Send a small batch through to confirm the filter works and the custom field updates correctly. Tools like Spamhaus and MxToolbox help validate sender reputation trends over time.
You’re now running a clean, reliable flow. No wasted sends. No risk to your domain reputation. For deeper integration, you can use our API to automate this at scale. Keep your list healthy. Let Zapier do the sorting.
What Each Email Result Means in Practice
When you verify a list, you’re not just checking for typos — you’re filtering out email addresses that will hurt your sender reputation, waste your sends, and hurt deliverability. Let’s break down what each result actually means, so you know exactly what to do with each one.
Understanding the Verification Verdicts
The core outcomes from any email verification service — including Emaillistchecker.io — fall into five categories. Each has a real-world impact on your campaigns.
| Verdict | What It Means | Recommended Action | Why It Matters |
|---|---|---|---|
| Valid | The email exists and the domain accepts messages. It’s deliverable. | Proceed with your campaign. Segment or personalize if possible. | These are your active subscribers. Sending to them improves inbox placement. |
| Invalid | The address doesn’t exist. Common in typoed or fake signups. | Remove it immediately. It will bounce and hurt your sender score. | Invalids are hard bounces — major red flags to ISPs like Gmail and Outlook. |
| Catch-all | The domain accepts any email, so we can’t confirm if the specific address is real. | Flag for review. Consider using a more accurate list source. | Catch-alls are red flags — you can’t validate, so sending risks being flagged. |
| Risky | High chance of failure. Often disposable, role-based, or low-quality. | Do not send without careful review. Exclude after 30 days. | These addresses are common in spam traps or temporary signups. They hurt reputation. |
| Disposable | Emails created for temporary use (e.g., tempmail.org, Mailinator). | Discard. They expire within days or weeks. | Any delivery to these is a bounce and can trigger blocklists. |
| Role account | Generic addresses like admin@, sales@, or support@. | Exclude or treat as very low priority. They rarely engage. | Low open rates, high bounces. Many ISPs flag these as spam. |
A 2018 study by Return Path found that senders with over 10% invalid email addresses in their list had a 35% higher chance of landing in spam folders — a real cost to deliverability.
How This Fits in Your Workflow
Once you’ve verified your list, use automation to clean it. You can integrate Emaillistchecker.io’s bulk verification with Zapier to auto-remove invalids from ConvertKit, keep risky emails in a review queue, and flag catch-alls for manual check. Try the bulk verification tool to process 1,000+ emails in minutes.
Don’t let your list grow with dead weight. Each address you verify is a decision point — and knowing what each result means gives you control.
Optimize Your Flow with Conditional Logic
Let’s be honest: you don’t want to waste time or send emails to bad addresses. Zapier gives you the power to make your ConvertKit flows smarter — but only if you put logic in place.
Filter Out Bad Emails Before They Hit ConvertKit
Use Zapier’s built-in filters to stop invalid emails from ever entering your list.
- After verifying an email with Emaillistchecker.io’s API, skip the Zap entirely if the result is invalid or disposable.
- Set the filter to check the verification status field (e.g., "status: invalid" → "don’t proceed").
- This prevents send attempts to addresses that will bounce, reducing your spam score risk.
Handle Risky Cases With Care
Some emails are not outright invalid — but they’re still worth watching.
- Use conditional logic to send emails flagged as risky (e.g., role-based, temporary, or catch-all) to a separate list or internal log.
- These might be valid, but they often have low engagement. A quick manual review helps you keep your list clean.
- Tools like bulk verification give you precise verdicts, including which ones are role accounts like sales@ or support@ — common sources of low deliverability.
Low inbox placement isn’t just about content — it’s about list quality. According to data from Spamhaus, high bounce rates correlate strongly with IP reputation loss. Even 5% bounce rate can trigger filters.
Stop the Workflow When List Quality Drops
Set an alarm for when things go wrong.
- Count the number of failed verifications in your batch.
- If over 10% fail, pause the Zap and send a notification (e.g., via Slack or email).
- This signals that your source list may be outdated or purchased — not a one-off glitch.
- Review the list and take action before sending again.
It’s easy to overlook low-quality inputs until they hurt deliverability. But a workflow that checks, filters, and signals issues stops problems before they scale.
“The cost of sending to dead addresses is not just wasted emails — it’s damaged sender reputation.” – Return Path (now Validity)
How This Integration Improves Deliverability
Let’s be clear: deliverability isn’t just about sending emails. It’s about making sure they land in inboxes, not spam folders or trash. You can’t control every variable, but you *can* control the health of your list—and that’s where integration with a real-time email verifier comes in.
Lower Bounce Rates, Stronger Reputation
Invalid or non-existent email addresses cause hard bounces. Every one of those bounces hurts your sender reputation. Over time, frequent bounces signal to providers like Gmail and Outlook that you’re not maintaining quality. The result? Lower inbox placement—or worse, blocking.
By verifying emails before they hit ConvertKit, you eliminate these invalid addresses upfront. That means fewer hard bounces, which helps preserve your sender reputation. It’s not a silver bullet, but it’s a foundational step that’s often overlooked.
Spam Traps Are Silent Killers
Some emails are valid—but dangerous. Spam traps exist in old, abandoned, and recycled addresses. If you send to them, even once, you risk triggering spam filters and blacklists.
Bad lists often have these traps buried in them. They don’t bounce, they don’t complain, and they’ll silently damage your long-term deliverability. Running your list through a reliable verification service helps flag these risks before they hurt you.
Tools like Emaillistchecker.io’s bulk verification detect not only invalid formats but also catch-all domains, disposable email addresses, and high-risk patterns—signs that might signal a trap or a low-quality address.
List Health Drives Engagement
Degree of deliverability isn’t just technical—it’s behavioral. The higher the quality of your list, the more likely people are to open, click, and engage.
When you filter out bad addresses early, you increase signal-to-noise ratio. Your messages go to real people. Open rates go up. Engagement metrics improve. That feedback loop reinforces trust with inbox providers over time.
This isn’t theory. Spamhaus consistently tracks sender behavior tied to list hygiene and confirms that consistent list maintenance correlates with higher inbox placement. It’s an industry-standard practice, not just a suggestion.
You don’t need to guess what’s working. A real-time verification layer between your list and ConvertKit gives measurable results: fewer bounces, stronger reputation, and better engagement. That’s how you keep your email program sustainable.
Why Emaillistchecker.io Stands Out for This Workflow
Let’s be clear: not all email verification tools are built the same. When you're integrating email verification with ConvertKit using Zapier, you need a tool that doesn’t just check addresses—it gives you clarity. Emaillistchecker.io delivers that.
Real-time checks. No guesswork.
- Uses real-time SMTP checks and domain intelligence to confirm email validity with 98.9% accuracy—no hypotheticals, no false positives.
- Clearly categorizes every email: valid, invalid, catch-all, or risky. No ambiguity. No confusion.
- Unlike some tools that leave you guessing, we don’t say “maybe.” We tell you exactly what’s happening—whether it's a typo, a disconnected inbox, or a domain that accepts all emails.
- That level of clarity means fewer bounces, better sender reputation, and higher inbox placement—metrics that matter when you’re sending to thousands via ConvertKit.
No pressure. Just clean data.
- Purchased credits never expire. You can verify your list in bulk today, then check again a month from now—no rush, no wasted spend.
- Whether you're doing a one-time cleanup or automating list hygiene every week, our bulk verification tool handles 10,000+ emails efficiently.
- For developers or teams building deeper workflows, our real-time API integrates smoothly with Zapier, allowing you to verify new subscribers instantly at signup.
- Combined with our email finder and inbox placement testing, you get a full deliverability stack without switching providers.
Many tools offer API access or bulk checks. What sets us apart is consistency. You're not just getting a list of “valid” or “invalid” — you’re getting a reliable, actionable snapshot of your data quality.
And yes, this has real consequences. Studies show even a 1% increase in bounce rate can hurt deliverability over time, especially on platforms like ConvertKit where sender reputation is tracked closely. Tools that miss catch-alls or mislabel risky domains create silent drains on your audience.
Because we’re built on standard email protocols—like RFC 5321 and RFC 5322—we align with how email actually works, not how it’s marketed. Real verification means real results.
For teams using Zapier to connect ConvertKit with workflows like CRM updates or segment filtering, Emaillistchecker.io is the trusted instrument. It doesn’t just verify email—it helps you maintain control.
Pro Tip: Run Verification on Existing Lists Before Campaigns
Let’s be honest—your ConvertKit list isn’t pristine. Over time, emails become outdated, domains die, and role accounts like admin@ or sales@ get added accidentally. These aren’t just clutter. They’re ticking time bombs for deliverability. A single bad email can sink your sender reputation, especially if you're sending at scale.
Start with a Full Clean Before Your Next Campaign
Before you hit send, run your entire list through a bulk verification tool. This isn’t a once-a-year chore—it’s foundational hygiene. Use the bulk verification tool to scan every email in your ConvertKit audience and return real-time feedback on validity, risk, and deliverability. You’re not just checking for typos. You’re identifying invalid domains, catch-all addresses, and disposable email addresses that never get opened. According to industry data, up to 20% of email lists lose validity each year due to natural attrition. The best way to combat that? Regular verification, not waiting until bounces pile up.
Update and Sync Automatically
Once you’ve verified your list, export the results. You’ll get back a clean file with status flags: valid, invalid, catch-all, risky. From there, you’re free to update your ConvertKit audience. You can do this via the API directly—no need to re-upload entire lists. Or, use a tool like Zapier to sync verified emails back in, so only known-good addresses survive. And yes, this can be automated. Set a monthly or quarterly trigger. Let the system run checks, flag issues, and update your subscriber list—without you lifting a finger. The goal isn’t perfection. It’s consistency. A healthy list means better deliverability, lower bounce rates, and higher ROI. Let’s say you send weekly newsletters. A clean list gives you real confidence that your message reaches real people—not ghost addresses or spam traps. The difference in inbox placement can be significant.
For a reliable, fast bulk verification pipeline, check out the bulk verification tool at EmailListChecker. It’s built for accuracy—98.9% verified, with no expiry on purchased credits.
And if you’re already using Zapier for other workflows, syncing verification results to ConvertKit becomes a seamless part of your routine.
Pro tip: The moment you’re tempted to “just send anyway,” pause. Run the check. A few minutes now saves hours of troubleshooting later.
Conclusion: Automation Is Your Best Defense Against Bad Emails
Integrating email verification with ConvertKit using Zapier turns a manual chore into a seamless, error-proof process. No more guessing whether an address is valid — the system checks in real time.
Automated verification is faster than manual review, safer than relying on unverified lists, and far more reliable than trusting guesswork or outdated tools. It protects your sender reputation and improves inbox placement by eliminating invalid or risky addresses before they ever hit your campaign.
Keep reading
- Email verification integrations for ESPs, CRMs and marketing tools (complete guide)
- Verify Email Addresses in Zoho CRM Using Third-Party Tools
- GetResponse Email List Cleanup with Email Verification Tools
- Boost Pipedrive Sales Conversion Rates with Email Verification
- Email Verification Plugin for WordPress EdTech Sites
Ready to put this into practice? Emaillistchecker.io verifies emails with 98.9% accuracy — start with 100 free verifications.
Frequently asked questions
Can I verify emails in ConvertKit without coding?
Yes. Using Zapier, you can automate verification with Emaillistchecker.io without writing code. Just connect the apps and set up the workflow.
What happens to invalid emails after verification?
They are filtered out automatically. You can set up rules to delete or mark them in your ConvertKit list.
Does Zapier work with ConvertKit’s API?
Yes. Zapier supports ConvertKit’s public API, allowing triggers like new subscribers and actions like updating custom fields.
How accurate is Emaillistchecker.io’s verification?
It achieves 98.9% accuracy by checking SMTP servers, domain reputation, and email patterns in real time.
Can I verify bulk lists using this Zapier setup?
Single emails are verified per Zap. For bulk verification, use the bulk check feature directly in Emaillistchecker.io.
Will this increase my email deliverability?
Yes—reducing invalid emails lowers bounce rates, which improves sender reputation and inbox placement.
Do I need API keys for both ConvertKit and Emaillistchecker.io?
Yes. You’ll need your ConvertKit API key and an Emaillistchecker.io API key to connect both apps in Zapier.
Can this setup handle role-based emails?
Yes. Emaillistchecker.io flags role addresses (like info@, admin@) as risky, so you can decide whether to include them.
How long does each verification take?
Real-time checks take 1–3 seconds per email using Emaillistchecker.io’s API.
Are purchased credits on Emaillistchecker.io permanent?
Yes. Credits never expire, so unused verifications remain available for future use.
Can I test this setup with a small list first?
Absolutely. Start with a small group of test subscribers to validate the workflow before scaling.
Does this integration work with paid ConvertKit plans?
Yes. All ConvertKit plans support API access, including the free tier, though limits may apply for automation.