DKIM Setup with Amazon SES and Troubleshooting Common Errors
Learn how to set up DKIM with Amazon SES step by step, avoid common errors, and ensure deliverability. Verify your domain's alignment and improve inbox placemen
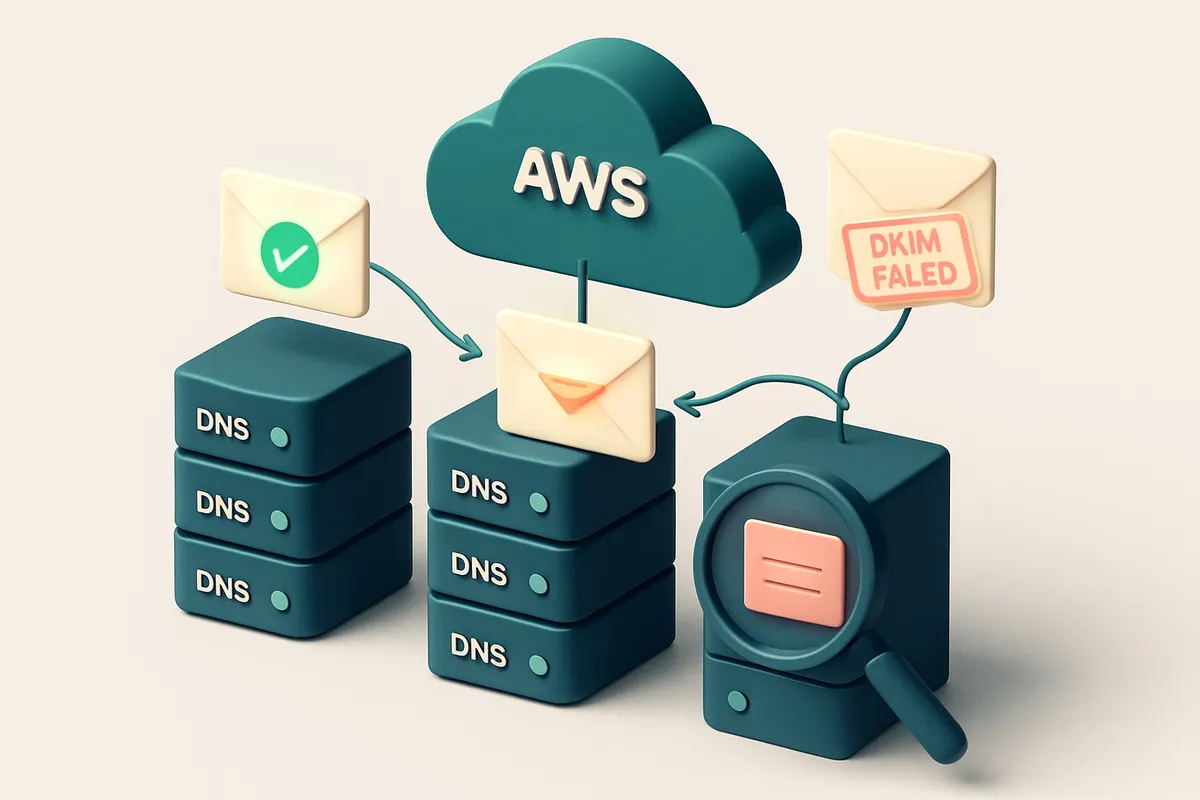
Why DKIM Matters for Amazon SES Deliverability
You send emails through Amazon SES, but some bounce. Others land in spam. You check the logs, the DNS, the API — but the fix isn’t obvious. It’s not always about list quality. Sometimes, it’s about authentication.
DNS settings are just the start. Without proper DKIM setup, your messages lack a digital signature that proves they’re truly from your domain — not spoofed, not altered. Amazon SES requires DKIM not as a suggestion, but as a gatekeeper to deliverability, especially at scale.
Think of DKIM like a tamper-proof seal on a letter. The recipient checks the seal before opening. If it’s missing or broken, the message gets treated with suspicion — even if it’s legitimate. This isn’t theory. It’s how major inbox providers evaluate trust.
Setting up DKIM with Amazon SES is not optional if you want consistent inbox placement. It’s a foundational step for reputation, volume, and long-term sender health. This guide walks through the setup and fixes the most common misconfigurations — so your emails aren’t blocked before they’re even seen.
Key takeaways
- Dkim setup is required by Amazon SES for high-volume sending and strong deliverability.
- Without DKIM, emails are more likely to be flagged as spam, especially from new domains.
- Misconfigured DKIM (e.g., incorrect selector or key format) is a frequent cause of delivery failures.
How DKIM Works: A Technical Foundation
When you send an email through Amazon SES, the service tacks on a digital signature to the message header using your domain’s private key. This signature is unique to that email and acts like a seal — it verifies the message hasn’t been altered in transit.
Verifying the Signature
Once the email lands in the recipient’s inbox, their mail server checks your domain’s DNS records for a public key stored in a TXT record. This key is the matching half of your private key. If the keys align, the message passes DKIM validation — it’s considered authentic and trustworthy.
But if the keys don’t match, the receiving server flags the message. That mismatch usually means someone tampered with the email or spoofed your domain. It’s not just a technical formality — it’s how big mail providers like Gmail and Outlook decide whether to deliver your message to the inbox or the spam folder.
DKIM is part of a layered defense against phishing and spoofing. It works alongside SPF and DMARC. While SPF checks the sending IP, and DMARC enforces policies, DKIM provides cryptographic proof of the message’s origin. Together, they form the foundation of modern email authentication.
Think of it this way: SPF says “This IP is allowed to send for this domain.” DKIM says “This message was sent by the domain and hasn’t been changed.” DMARC ties them together by defining what to do if either check fails — whether to quarantine, reject, or allow the message.
For more on how these protocols work together, the IETF’s RFC 6376 (the official standard for DKIM) is the definitive guide. You can read the full specification at tools.ietf.org/html/rfc6376.
If you're setting up DKIM with Amazon SES, make sure your DNS TXT record includes the full DKIM selector and public key. A typo in the selector, a missing quote, or incorrect record format will break the validation. Even a small formatting error can result in a failed signature.
One way to catch these issues early is to test your list before sending. You can verify a list of emails quickly with our bulk verification tool, which checks for valid, deliverable addresses — and catches many common sending problems before they hit the inbox.
DKIM isn’t a magic fix, but it’s essential. Without it, your domain is easier to spoof. With it, you raise your delivery rate, build sender reputation, and reduce the chance of your emails being flagged or blocked.
Step-by-Step: Setting Up DKIM in Amazon SES
Prep Work: Confirm Your Domain is Verified
Before enabling DKIM, make sure your domain is already verified in Amazon SES. This step ensures you have administrative control over the domain’s DNS records. If you haven’t set this up yet, do it first via the SES console under Identity Management. Without domain verification, DKIM cannot be activated.
Enable DKIM via the Console
Let’s walk through the actual setup:
- Sign in to the AWS Management Console. Navigate to Amazon SES in the services menu.
- Go to 'Domains' under 'Identity Management'. Select the domain you want to authenticate with DKIM.
- Click 'Edit' and choose 'Enable DKIM'. Amazon SES will generate three DNS TXT records needed for verification and key deployment. This is the core of SPF/DKIM/DMARC alignment — your messages are now cryptographically signed to prove authenticity.
- Copy each DNS record exactly as shown. You’ll see a public key (for receiving mail servers to verify signatures), a selector (a label for identifying which key to use), and a verification token (proof of ownership). Accuracy here is critical — even a single character error breaks the process.
- Add the records to your domain’s DNS provider. Whether you’re using Route 53, GoDaddy, Cloudflare, or another registrar, paste each record into the appropriate TXT record field. Most providers allow multiple TXT entries.
- Wait 10–15 minutes for DNS propagation. DNS changes don’t take effect instantly. Use tools like MxToolbox or dnschecker.org to test if records are live before moving on.
- Click 'Verify' in the SES console. Once propagation completes, SES will validate the records. Status updates to "DKIM Enabled" when the system confirms the keys are properly published.
What Happens Next?
Once enabled, Amazon SES automatically signs all outbound email from your verified domain using your private key. Receiving mail servers check the public key via DNS to validate integrity. This reduces the risk of your emails being marked as spam or rejected outright. According to RFC 6376 (the DKIM standard), signed messages are more likely to reach recipients' inboxes — a real-world impact on deliverability. If you're managing large mailing lists, it’s also worth verifying the validity of your recipients. Outdated or invalid addresses increase bounce rates and hurt sender reputation. For that, consider using a tool like Bulk Email Verification to clean your list before deployment. Your DKIM setup works only if published correctly. If status remains unverified, check for typos in the TXT records, ensure you’re not using an IP-only domain, and confirm no conflicting DNS records exist. Errors here aren’t uncommon but are entirely fixable with careful inspection.
Common DKIM Setup Errors and How to Fix Them
Copy-Paste Gotchas That Break Validation
You’re not imagining it: a single space, a stray quote, or a missing hyphen in your TXT record can prevent DKIM from working. Even the smallest typo invalidates the entire DNS entry.
Amazon SES requires the exact format, including the correct syntax and quotes around the selector. Let’s say you’re using s1 as your selector — the full record must match their template exactly, with no deviations.
Use a DNS validation tool like MXToolbox’s DNS Check to verify your record before hitting send. This catches errors early and saves you hours of back-and-forth with AWS support.
The Silent Killers: TTL, Propagation, and Selectors
- Double-check your DNS TXT record name. If you're using
s1._domainkey.yourdomain.com, ensure the selector s1 matches exactly — nots2or1s. A mismatch means no signature validation. - Set your DNS TTL to 300 seconds or higher. Low TTLs (like 60) make it harder to diagnose propagation issues and don’t accelerate sync times — they just make troubleshooting harder.
- Wait 15–30 minutes before testing. While most DNS providers propagate within 15 minutes, some take longer. Don’t assume it’s broken just because you tested immediately after update. RFC 5321 confirms that DNS record resolution is stateless and depends on propagation timing.
- Never use a deprecated key format. Amazon uses a specific
dkim=1;versioning syntax. If you’re using an older format or manually editing the key, it won’t work. Stick to the exact format AWS provides in the SES console. - Ensure your domain’s public DNS includes the full TXT value. If you’re trimming whitespace or combining multiple records into one, you’re breaking the format. Each record must be distinct and complete.
- Monitor your sending domain’s reputation. If you're seeing DKIM failures post-setup, check if your sender IP is on a blocklist — even a valid DKIM can be ignored if the sending IP is blacklisted.
For high-volume senders, validating your recipient list upfront reduces the risk of misattribution. A clean list means fewer bounces and better domain reputation.
Bulk verification helps you catch invalid or problematic emails before you even send — preventing DKIM failures that stem from sending to non-existent addresses.
Verifying DKIM Configuration is Complete
Let’s make sure your DKIM setup with Amazon SES is actually working—because even the cleanest code can fail silently if the DNS records aren’t public or properly formatted. The first step is to verify that all three DKIM TXT records are visible and correct. Use a real DNS lookup tool like MxToolbox, which pulls real-time data from the global DNS system. You’ll need to query each of the three domain names Amazon SES provides (like `default._domainkey.yourdomain.com`, `dkim1._domainkey.yourdomain.com`, and `dkim2._domainkey.yourdomain.com`) and check that the full record is returned without truncation.
Check for DNS Record Limits and Overlaps
DNS labels have a hard limit of 255 characters. If your DKIM record exceeds this, the DNS server may silently truncate it, which breaks DKIM validation. You can easily confirm this by pasting the full record into a tool like MxToolbox’s TXT record lookup. Avoid splitting records or combining multiple entries in a single label—this causes overlap and is invalid. Each DKIM key should be its own separate TXT record, with no extra data or formatting quirks.
Test Through Real Message Validation Tools
Now that your DNS records are live, test an actual email sent via your AWS SES account. Use tools like dmarcian.com or mail-tester.com—they analyze SPF, DKIM, and DMARC in one view. They’ll send a test message to a disposable inbox and return detailed feedback. If DKIM fails, it’s usually because of misformatting, missing records, or an incorrect selector. The report will show exactly where it went wrong—whether it's the signature mismatch, missing key, or domain error. Also, double-check the AWS SES console. Go to the Identity Management section and confirm that your domain shows as “Verified” and that DKIM status is listed as “Enabled” with no warnings. If it says “Pending” or “Invalid,” re-verify your DNS entries. Changes can take up to 72 hours to propagate globally, so patience is key. You can also use the ESP Sender Reputation Checker tool from the Internet Society’s [Spamhaus Project](https://spamhaus.org/) to see if your domain has been flagged for abusive behavior. While not DKIM-specific, it's helpful for monitoring long-term deliverability health. Finally, if you're managing large lists and want to catch email-related delivery problems before they impact your campaigns, you might want to verify your sender list in bulk. Tools like EmailListChecker’s bulk verification can flag invalid, role-based, or disposable emails that might otherwise harm your sender reputation.
DKIM, SPF, and DMARC: The Trio That Powers Email Trust
Let’s talk about the foundation of email deliverability: three protocols that work together to prove your messages are real, unaltered, and trustworthy. If you’re setting up Amazon SES, you need this trio running — not as optional extras, but as hard requirements for inbox placement.
SPF: The Gatekeeper
SPF (Sender Policy Framework) tells receiving servers, “Only these IPs are allowed to send emails from my domain.” You define it in your DNS records. If an email comes from an IP not on your SPF list, it’s flagged — even if it’s technically valid. SPF alone isn’t enough, though. It only checks the sending IP, not the content of the message. For that, you need DKIM.
DKIM: The Digital Signature
DKIM signs each email with a unique cryptographic fingerprint. When a receiver gets your message, it checks that signature against your public key in DNS. If it doesn’t match, the email was altered in transit — a red flag. DKIM ensures integrity. It’s like putting a tamper-proof seal on every email. But what happens when SPF or DKIM fails? That’s where DMARC comes in.
DMARC: The Enforcement Layer
DMARC (Domain-based Message Authentication, Reporting, and Conformance) is your domain’s policy engine. It tells receivers, “If SPF or DKIM fails, here’s what to do: quarantine, reject, or just log it.” You can also enable feedback loops to receive reports about failed messages — a crucial tool for spotting spoofing attempts. These three aren’t just theoretical. They’re required by major email providers. Gmail, Outlook, Apple Mail — they all rely on them. Without proper alignment, even well-crafted messages get rejected or sent to spam. You can’t skip SPF just to focus on DKIM setup with Amazon SES. You must have all three. Even one missing breaks the trust chain. The setup is straightforward on Amazon SES. It provides a DKIM selector and public key. You add those DNS records, and SES handles signing. But if your DNS isn’t configured right, or you misplace a record, you’ll get soft bounces or no delivery at all. This is where tools like bulk verification help — they can flag problematic domains or missing records before you send. They won’t set up DKIM for you, but they’ll help you clean up your list so your authentication checks don’t fail on invalid addresses. For developers, the verification API integrates directly into your workflow. Use it to validate and clean your sender list in real time, catching issues before they impact your sender reputation. And when you’re ready to test inbox placement, the inbox placement test gives you hard proof of whether your emails are landing where they should. These protocols are built on standards. SPF and DKIM are defined in RFC 7208 and RFC 6376. DMARC is defined in RFC 7483. You can read them directly at the IETF site — no third-party interpretation needed. The bottom line: if you’re sending emails at scale via Amazon SES, you don’t have a choice. SPF, DKIM, and DMARC are the baseline. No exceptions.
What Happens If DKIM Fails or Is Missing?
Let’s be clear: DKIM isn’t optional for reliable email delivery with Amazon SES. If your DKIM setup fails or is missing entirely, you’re not just skipping a technical step—you’re opening the door to rejection, spam filtering, and long-term deliverability damage.
Rejection and Spam Filtering Are Real Risks
Receiving mail servers check DKIM signatures as part of their authentication stack. If the signature fails or isn’t present, they’ll treat your message as unverified. That means you’re not just asking for trouble—you’re inviting it. Many systems will mark your email as suspicious, and in some cases, reject it outright before it even hits the inbox.
Even if delivery isn’t blocked, messages without valid DKIM are far more likely to land in spam folders. Authentication signals like DKIM help inbox providers judge sender trustworthiness. No signature means no trust signal—just like showing up to a meeting without ID.
Sender Reputation Takes a Long-Term Hit
Amazon SES monitors sender reputation closely, and consistent DKIM failures are a red flag. Over time, repeated failures, especially across large volumes, signal poor sender hygiene. That reputation score impacts everything: delivery rates, inbox placement, and whether throttling or suspension follows.
For example, when a sender repeatedly fails authentication checks, SES can reduce sending limits or disable the account entirely. This isn’t hypothetical—spammers often exploit weak authentication, and systems like SES are designed to detect those behaviors early. If you’re not authenticated, you’re not trusted.
That’s why a single misconfigured DKIM record can lead to cascading issues. It doesn’t just hurt one message—it affects future sends, even if the fix is applied later. The damage is cumulative, and reputation is slow to recover.
Pro tip: Use tools that validate both DNS records and the full email flow. Before you start sending bulk campaigns, verify your domain’s authentication setup across all layers—SPF, DKIM, and DMARC—to avoid being flagged as a risk.
If you’re unsure whether your list is clean or your domains are set up correctly, double-check your data. You can test your setup and screen for risky addresses with bulk email verification. It’s a solid way to catch issues before they impact reputation.
Preventing DKIM Issues Before They Start
DKIM setup with Amazon SES is straightforward—but the real challenge starts after you send. Misconfigurations, poor list hygiene, and volume spikes can all trigger authentication failures, even if your DKIM signature is technically correct. Let’s fix that before it breaks.
Start with a Clean List
You can’t authenticate what you can’t deliver. Sending to invalid or malformed domains floods your SES logs with bounces and can distort your sender reputation. Let’s be honest: a single bad domain in a 10,000-email list can trigger a red flag in the eyes of receiving providers.
- Run your email list through a bulk verifier before any send. Emaillistchecker.io checks for syntax errors, invalid domains, and disposable addresses—catching issues before they hit SES.
- Use the real-time verification API during onboarding or signup flows to stop invalid data at the source.
- Filter out catch-all domains. These accept any email address, making deliverability tracking impossible. They’re often associated with spam traps and can harm your reputation.
Avoid High-Risk Addresses and Build Trust Gradually
Even if your DKIM is set up right, sending to role-based or generic addresses (like info@ or support@) increases the risk of false positives. Many of these boxes are monitored for abuse, and messages sent there may be flagged as suspicious—regardless of your alignment.
- Use tools like Emaillistchecker.io’s email finder to identify individual recipients instead of generic roles.
- Monitor bounce reports in Amazon SES daily. Hard bounces (5xx errors) mean a problem with your list. Soft bounces (4xx) often signal temporary issues, but repeated soft bounces can still hurt your sender reputation.
- Adopt a domain warm-up strategy. Start small—send 100–200 emails per day—and gradually increase volume over 3–4 weeks. This signals to providers that you’re a legitimate sender, not a sudden spammer.
- For larger sends, test inbox placement with inbox placement tools before a full campaign. You’ll see real-world deliverability results across Gmail, Outlook, and other major providers.
“A domain’s reputation is built on consistent, intentional sending behavior—no amount of DKIM strength can compensate for poor list hygiene.”
Amazon SES provides solid infrastructure, but it doesn’t validate your message content, list quality, or sender intent. The real work happens before you hit send. By focusing on list quality, avoiding risky addresses, and warming your domain gradually, you reduce the chances of DKIM issues—even when everything looks correct on paper.
DKIM Troubleshooting in Practice: Real Scenarios
You set up DKIM with Amazon SES, but the status just sits at “Pending.” No email sends through. Let’s figure out why.
Check DNS Propagation and TXT Record Integrity
DNS changes don’t take effect instantly. Even after you publish your DKIM TXT record, it can take 10 to 60 minutes — sometimes longer — to propagate globally. Use a tool like dnschecker.org to verify your record is live across multiple global DNS servers. If it’s missing in some locations, you’re still in a limbo state.
Also, make sure you didn't accidentally merge or split the TXT record. AWS expects one TXT record per selector, each with its own full value. Some DNS providers collapse multiple TXT entries into a single record or apply length limits. Check the full record length — a single TXT value must not exceed 255 characters, so AWS uses multiple sub-entries. Verify it matches the exact format issued by SES.
DKIM Fails While SPF Passes: Focus on the Key
SPF checks domain authentication, but DKIM validates message integrity. If SPF passes and DKIM fails, the issue almost always lies in the key. The public key you published may be outdated, truncated, or misaligned with the private key in your SES setup.
Go back to the AWS SES console and recheck the DKIM records under the domain. Copy the full public key from there and paste it into a DNS lookup tool. Ensure every character matches exactly — even a single typo breaks validation. If it doesn’t, regenerate the DKIM keys in AWS. It’s quick and ensures you’re using a fresh, valid key.
Let’s say you're managing multiple domains in the same SES account. Suddenly, DKIM fails across the board. This usually points to a misconfiguration in your DNS zone setup. AWS requires the domain to be explicitly verified and attached to your SES account. If your DNS provider automatically strips or merges TXT records — common with large-scale email platforms or content delivery networks — you might be losing critical authentication data.
Double-check that you’ve added your domain to AWS SES and that the DNS zone is correctly associated with the account. Also, review your DNS provider's documentation. Some providers merge TXT records or apply sanitization rules that interfere with DKIM's strict format.
When in doubt, test your domain with a real email. Send a test message from SES and check the headers. You’ll see the DKIM signature and verify if the selector matches and the public key is reachable.
For teams managing large mail lists, ongoing verification helps catch misconfigs early. You can use bulk email verification to test sender reputation and authentication health across every address, reducing bounces and keeping deliverability high.
How Emaillistchecker.io Supports DKIM and Deliverability
Let’s be clear: DKIM setup with Amazon SES is only part of the story. Even the strongest cryptographic signature can’t fix a poor list or a damaged sender reputation. The real win comes from combining proper authentication with consistently clean data.
Start with a clean list — every time
Before you even send a message, you need to know your list is valid. Emaillistchecker.io’s bulk verification tool scans your entire email list in minutes and flags invalid addresses, catch-all domains, and disposable email providers before they harm your deliverability. This reduces hard bounces and keeps your sender reputation in good standing — a must when Amazon SES monitors your sending behavior.
Verify in real time, test in real inbox
The real-time API lets you verify individual email addresses on the fly, catching invalid domains or risky patterns before they hit your queue. It checks against known disposable domains, detects catch-alls that may appear valid but don’t accept mail, and spots malformed addresses — all common drivers of delivery issues. You can also test how your emails land across major providers with inbox-placement testing. Run a campaign simulation through Emaillistchecker.io’s inbox placement tool to see where your messages land (inbox, spam, or blocked) with Gmail, Outlook, and Yahoo. It’s not perfect, but it gives you a realistic preview of deliverability risks — especially useful when testing new campaigns or domains. A clean list improves inbox placement. A bad list breaks DKIM even if set up correctly.
Accuracy that lasts
With a 98.9% accuracy rate and no expiration on purchased credits, Emaillistchecker.io helps you reduce errors from poor list hygiene — one of the most underrated factors in successful DKIM validation. When your list is accurate, you’re less likely to trigger filtering rules. You’re also less likely to be flagged for sending to non-existent or high-risk addresses that hurt domain reputation. The tool integrates with your existing workflow, whether you use Mailchimp, HubSpot, Klaviyo, or SendGrid. Clean your list before every send and monitor your sender health over time. The same list that you verify with bulk checks can later inform your inbox-placement tests. Start with bulk verification While DKIM ensures authenticity and DMARC enforces policy, your list hygiene determines whether those policies matter at all. A well-verified list reduces false positives and minimizes the chance of messages being treated as spam — even when your cryptographic setup is flawless. For a deeper dive into how email validation plays into overall deliverability, refer to the Internet Engineering Task Force (IETF) guidelines on email standards: RFC 5322. It outlines the structural expectations for valid email messages — a solid foundation for any sender, regardless of platform.
Final Takeaway: DKIM Isn't Optional for Reliable Email
Setting up DKIM with Amazon SES involves precise DNS configuration, but skipping it means risking deliverability. Without proper DKIM alignment, even legitimate emails can be flagged or rejected by receiving servers.
A single misconfigured DNS record—like a typo in the selector or an incorrect TXT value—can break authentication entirely. These errors don’t just cause bounces; they degrade sender reputation over time, leading to higher spam filtering and lower inbox placement.
| Authentication Protocol | Role in Deliverability |
|---|---|
| SPF | Validates the sending server's IP address |
| DKIM | Verifies message integrity and sender identity |
| DMARC | Enforces policies for failed authentication |
When DKIM is combined with correctly configured SPF and DMARC, it creates the trust foundation modern email systems rely on. Proactive verification of sender lists, consistent DNS monitoring, and real-time inbox-testing help maintain that trust.
Keep reading
- Email authentication: SPF, DKIM, DMARC and BIMI (complete guide)
- Understanding SSL/TLS vs STARTTLS in Email Security
- Key Differences SSL vs TLS vs STARTTLS Explained
- StartTLS vs SSL/TLS: What's the Real Difference for Email Security?
- SSL vs TLS vs STARTTLS: Secure Email Transmission Explained
Ready to put this into practice? Emaillistchecker.io verifies emails with 98.9% accuracy — start with 100 free verifications.
Frequently asked questions
Can I use DKIM without SPF and DMARC?
Yes, but doing so limits your protection. Each protocol serves a different role. SPF controls sending IPs, DKIM signs messages, and DMARC defines policy enforcement. Using all three provides full trust and improves deliverability.
How long does it take for DKIM to become active after DNS setup?
DNS propagation typically takes 10 to 15 minutes. Most providers reflect changes quickly. Allow up to 30 minutes for AWS SES to detect the new records and update the status.
What happens if I delete the DKIM TXT records from DNS?
Amazon SES will stop signing emails with DKIM. Existing messages remain valid, but new messages will fail authentication. Your email deliverability will degrade over time.
Why does my DKIM status show 'Pending' in AWS after DNS updates?
Your DNS records may not have propagated yet, or there’s a typo in one of the TXT entries. Verify all three records using a DNS lookup tool and double-check for missing or extra quotes.
Does DKIM affect email content?
No. DKIM signs the message header and parts of the body as defined in the header. It does not alter how the email appears to the recipient. Only the signature changes.
Can I use DKIM with multiple Amazon SES identities?
Yes. You can enable DKIM for each domain independently. Each domain must have its own set of DNS TXT records, but they can coexist on the same DNS zone.
What if my domain already has DKIM set up for another service?
Amazon SES can coexist with existing DKIM, but only one DKIM key is active per domain per mail server. You must ensure your current setup does not block or override SES’s signatures.
Does DKIM help prevent messages from being marked as spam?
Not directly — spam filtering uses many factors. However, passing DKIM increases your sender trust score. It reduces the chance of rejection and helps avoid spam folder filtering.
How often should I audit my DKIM records?
Audit at least once every 30 days, especially after infrastructure or DNS changes. Unexpected failures often stem from forgotten or outdated records.
Is DKIM required for Amazon SES to send emails?
No, but it’s required for high-volume sending and to maintain strong sender reputation. Without DKIM, your messages are more likely to be throttled or rejected by receiving servers.